German DJ, producer and composer Marc Romboy has collaborated with long-time friend Oniris on the renowned Systematic Recordings this March with ‘First Blush’. The duo first joined forces on the well-received ‘Music From Space’ compilation in October, and on remix duty is the renowned Extrawelt. The two-track EP delivers everything you would expect from a Systematic release, a melodic journey, encompassing that futuristic sound.
‘First Blush’ was made after Marc Romboy went down to the South of France for a studio session in the studio of Oniris earlier last year. Oniris is a long-time friend, who has previously released music on labels such as Bedrock, Ovum, and of course Astropolis. ‘First Blush’ is a melodic stomper which has been in many playlists throughout some well-known DJ sets over the past few months already.
Today, we step into the studio with Oniris to celebrate the release of ‘First Blush’ and to learn 5 studio tips for a richer sonic design.
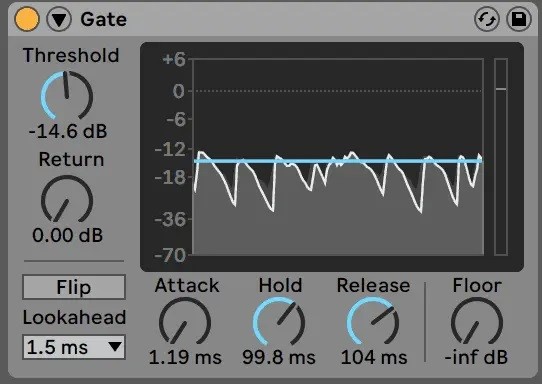
1. Tighten Up Sounds and Create Groove with Gate
In a nutshell, Gate turns down quiet sounds under a certain threshold, allowing only a certain loudness of audio to pass through. This can get rid of unwanted background noise, or the long tail of an annoying kick drum.
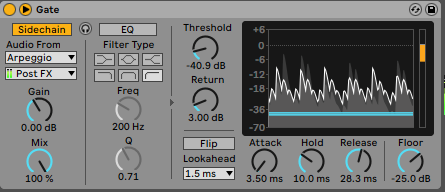
You can also use it to apply the groove of a Stem to another one. For example, put the gate on your shaker loop then sidechain the gate on Arpeggio of your track, then it applies the groove of the arpeggio on the shaker.
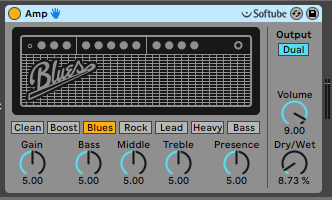
2. Use Amp to make the Sound Brighter
Just load the Amp with the default preset from Ableton, then play with the Dry/Wet button to have a brighter sound (0 to 40%). This trick is very simple but very effective.
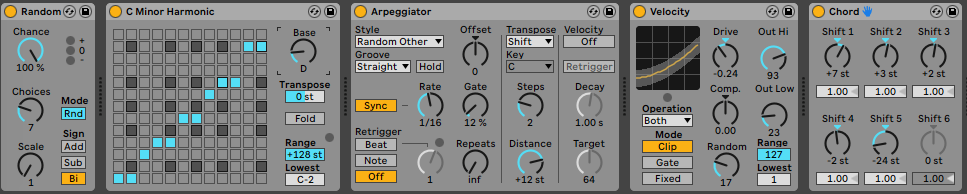
3. Generate Random Melodies
When you start a track and you don’t really have a good idea, create and use your own “Random Melody Generator”. These are mines, Choose the key in the Scale MIDI Effect, then play with all the parameters to generate unique clips:
– The first one to generate the Arpeggios
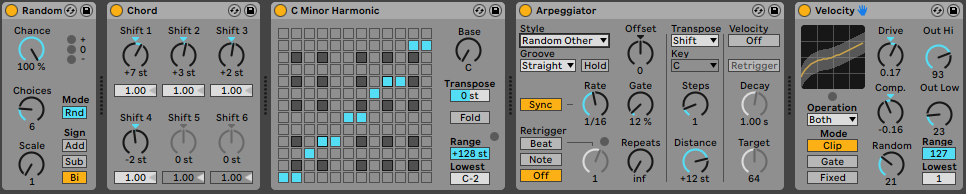
– The second one to generate the Chords: (then put the Chord effect at the end)
4. Mid/Side EQ
EQ Eight is a killer tool, not just because of its simplicity and effectiveness, but also its extra features that you wouldn’t expect from a stock standard EQ device.
One of these features is the Mid/Side mode, allowing you to have 8 bands for the mid-channel and 8 for the side.
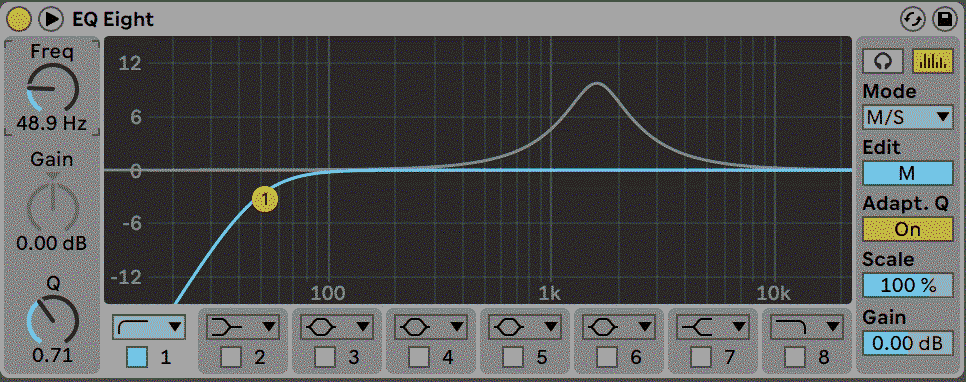
Activate it by changing the Mode to ‘M/S’, and then you’ll have an option below to edit either the Mid (M) channel or the Side (S) channel.
If you have some unwanted low frequencies in the stereo field, you can eliminate them with a high-pass on the side.
For example, to avoid phasing problems on the bass in the low frequencies, you can cut the stereo part below 100Hz.
5. Stacking Filters
This isn’t specific to Live necessarily, but it’s dope nonetheless.
Use multiple instances of Auto Filter (2 or more), and set each one to a different filter type with different LFO movements. This can add life to pads, textures, or any sound, as the resonances sweep through each other.

A lowpass, a bandpass and a lowpass. Every sweep sounds different.
‘Marc Romboy & Oniris – First Blush’ will go live on 11th March via Systematic Recordings here.
Follow Oniris: SoundCloud | Instagram | Facebook
Follow Marc Romboy: Soundcloud | Instagram | Facebook | Spotify