")
Weska’s journey as an artist has been one of hard work and dedication, culminating in the release of his music on some of the most prestigious labels in the industry. From Drumcode to Mute, Cocoon to Bedrock, Kraftek to Filth On Acid, and more recently Factory 93, Weska’s talent and drive have earned him a place among the greats.
Now, Weska and Charles D make highly anticipated returns to Factory 93, this time uniting for two collaborative tracks across ‘Dovercourt / Limelight’.
To celebrate the drop of ‘Dovercourt / Limelight’ on Factory 93, Weska invites us into his studio for a Creative Vocal FX Technique.
Creative Vocal FX Technique
We’re going to make a drawn-out and delayed vocal effect. I use this creative FX technique in a ton of my tracks as I find it’s a great way to make a standard sample or vocal sound unique while simultaneously creating an atmospheric soundscape. My favorite part about it as well as that it’s fairly simple to create and set up for future use. I use this technique as ear candy throughout my track, in a breakdown, or as a transitional effect, but of course, you can use it whenever you deem fit.
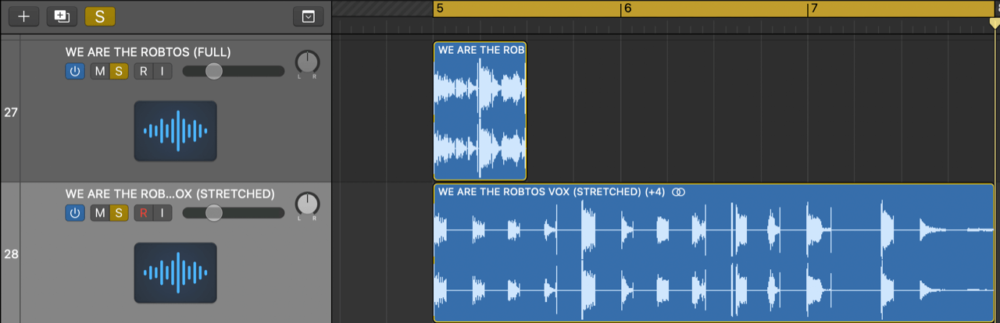
1. Start by finding a sample. This can be done using a vocal from a vinyl, acapella, sample pack, or YouTube for that matter. If you already have a vocal in your track, duplicate it onto a new channel. Now, time stretch it by a bar or two. In Logic, this can be done by holding ALT, clicking, and dragging out the bottom right corner.
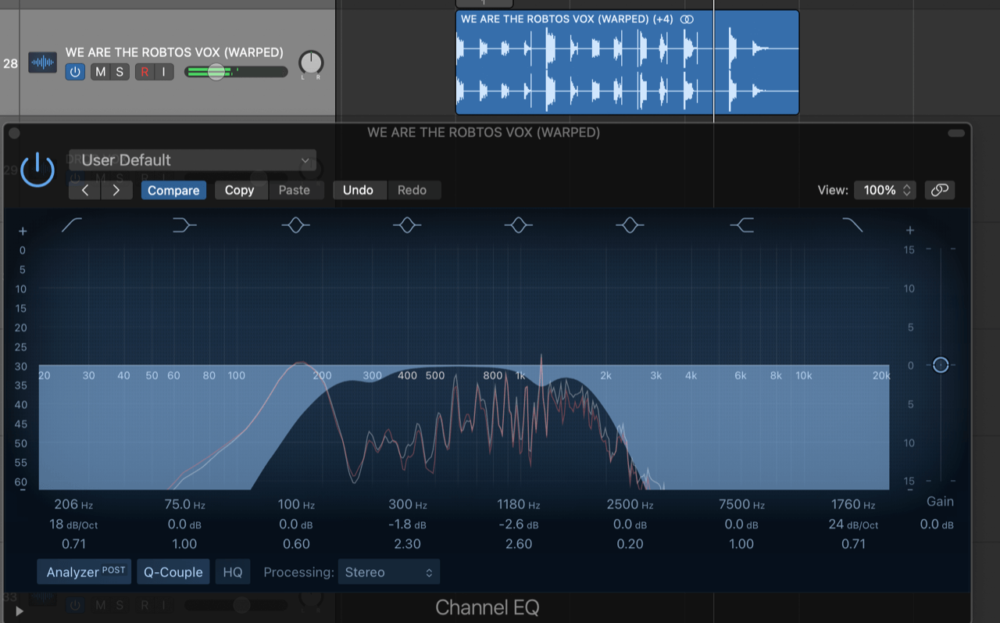
2. Next, apply some EQ to clean up the low and high ends of the vocal, and remove any resonance frequencies. I want this effect sitting in the back of the mix so I’m using a hi-cut at around 2k to remove a lot of the top end of the vocal. Your vocal should now slightly resemble the sound of a telephone speaker now but with a touch more body to it.
3. Now take your favorite reverb plug-in and place it directly on the channel. I’m using a ‘Large Room’ setting in Valhalla Room at around 50% wet and with a decay time of around 7 seconds. This will further aid in placing your effect in the back of your mix. Then clean up the reverb you just applied with an EQ and optionally, you can now apply a decibel or two of compression to round out the channel.
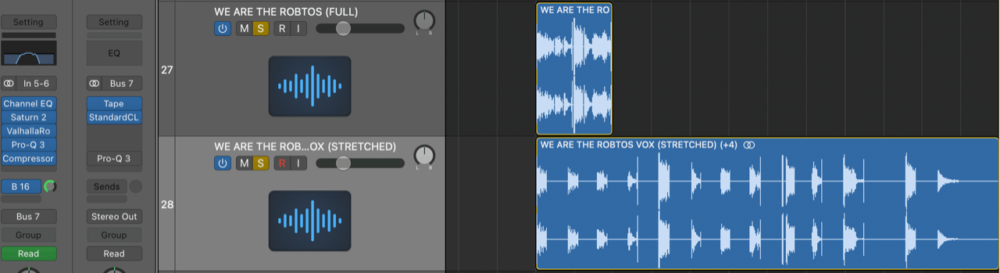
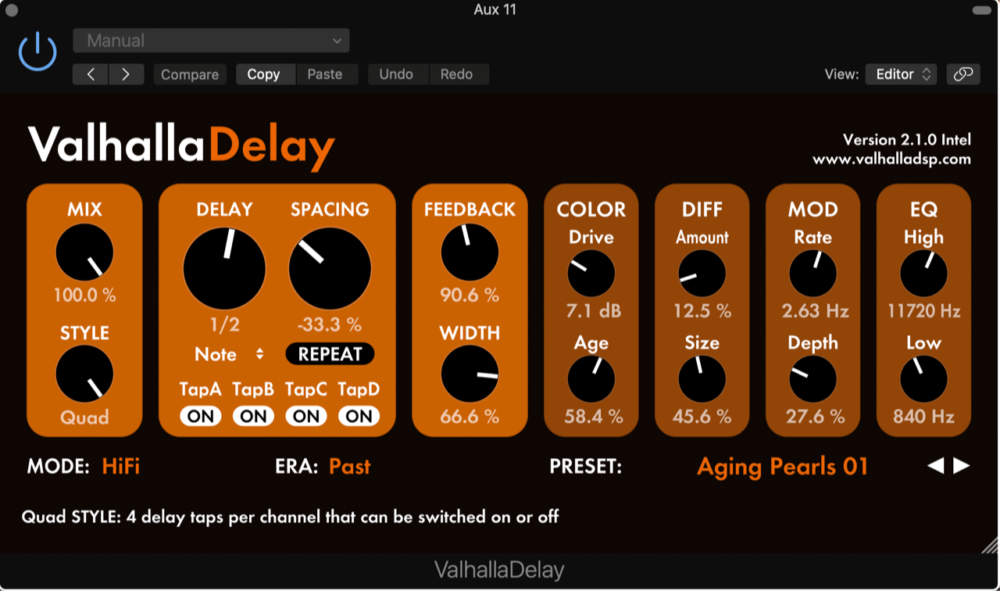
4. Finally, create a send delay channel. This is where the atmosphere of the effect really comes out. I’m using Valhalla Delay and I love the ‘Aging Pearls 01’ preset. You can adjust your send as much as you want, but I’m using quite a lot as I want this vocal effect to really cascade across my track.
You should now have a washed-out and slow vocal effect that can be used in combination with your original vocal to create a unique effect. To further customize, you can export the channel, import the file back into your DAW, time stretch the file another bar or two, and apply more delay or reverb to create a really unique and drawn-out atmosphere. I’ve used this technique in a lot of my songs, including ‘Lost On You’, ‘EQ64’, and ‘House Of Lords’ to name a few. Also worth noting – this effect can be used on any form of audio and is not limited to vocals. I love using it on pads and other atmospheric effects to create ethereal and cavernous soundscapes.
Weska & Charles D’s ‘Dovercourt / Limelight’ is out now via Factory 93. Purchase your copy here.
Follow Weska: Instagram | Facebook | Soundcloud | Spotify